ALL ORDERS PLACED AFTER 13th MARCH WILL BE DISPATCHED ON 26th MARCH

Napkin Bows 'How To' Guide

Napkin Bow


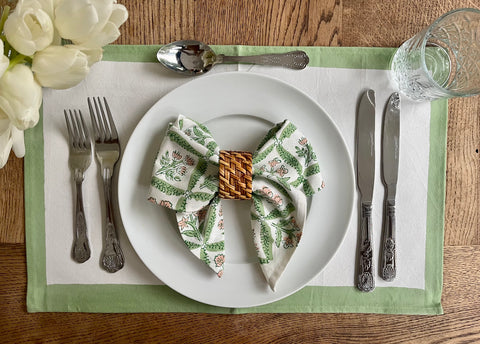
From folded cloth to folded art, a beautifully folded napkin can change the look of any table setting and bring a little bit of fun with it. There are so many designs to choose from and they're not a tricky as they may look. 

One of our favourite folds is the napkin bow. Follow along with these five easy steps and you will be wowing your dinner guests in no time. 

Five Simple Steps

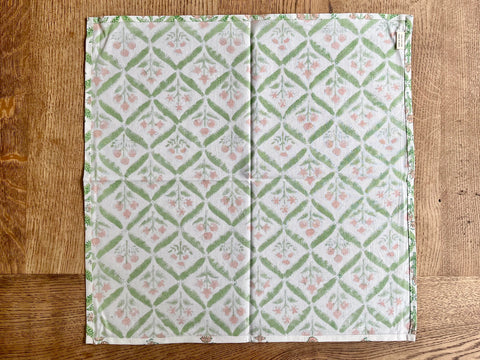
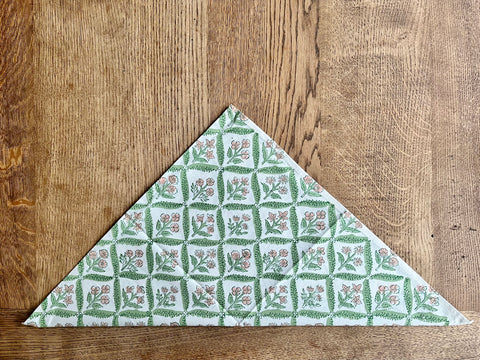
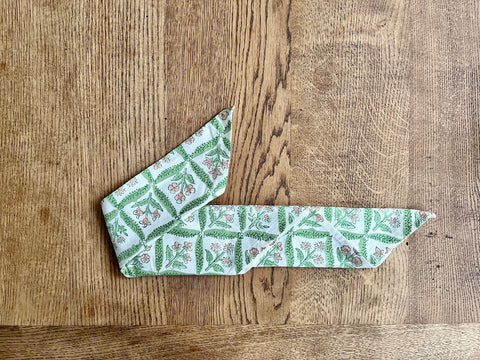
1. Open out your napkin with the pattern or print facing downwards. Fold two opposite corners together to form a triangle.

Napkin Bow Step 1      Napkin Bow Step 2


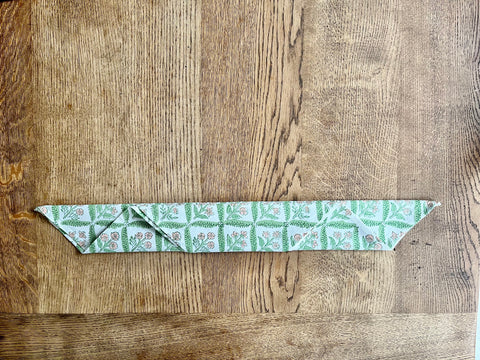
2. Fold the long edge up to the point of the triangle. Then, fold the short edge up to the long edge.

 
Napkin Bow Step 3    Napkin Bow Step 4
 
 
3. Fold each end inwards at a 45 degree angle crossing over each other.
 
Napkin Bow Step 5    Napkin Bow Step 6
 
 
4. Pinch the centre of the napkin to gather together and pull one end through the napkin ring. Tip: If you don’t have any napkin rings just use a piece of ribbon or pretty string and tie around the centre of the bow. You’ll get the same effect.
 
Napkin Bow Step 7 
 
 
5. Pull the ends of the napkin down to form the tail of the bow, arrange to your liking and place on your plate.
 
Napkin Bow Finished
 

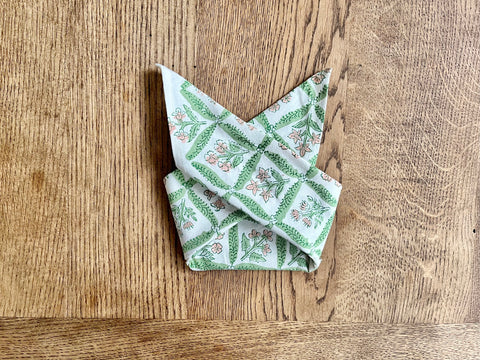
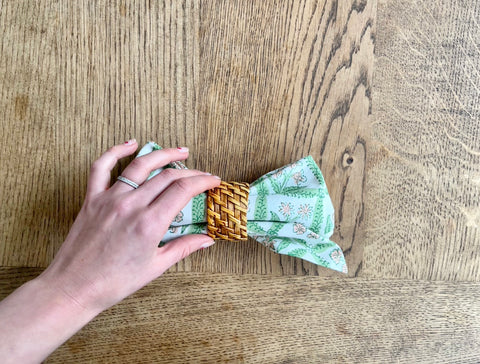
Et Voila! A perfect and pretty addition to your table setting. 


I hope that this how to guide has been helpful and look forward to seeing your creations - please share! For more tablescape inspiration follow us on Instagram @monicapepperuk. 

Table linen used in the guide above:

- The Walled Garden Napkin Set

- Moss Green Edged Placemat Set

Leave a comment

Please note, comments must be approved before they are published